No products
Translate to language
- Terraria
- Construction of the terrarium
-
Terrarium equipment
- Decorations
- Hideout
- Padlocks and locks
- Bowl
- Heating
- Lighting
- Tweezers, shoulder blades, hooks
- Ground
- Foods
- Preparations
- Gauges
- Vitamins and supplements
- Waterfalls, steam generators and condensers
- Sprinklers
- Artificial plants
- Rośliny
- Background walls for the terrarium
- Thermostats and sleep timers
- Faunaria
- Islands and filters for turtles
- Incubation
- Sprinkler systems MISTKING®
- SOLARMETER® Meters
- Supplements foods REPASHY
- LED SKYLIGHT lighting
- Car emblems
- DISCOUNTED PRODUCTS
- Protective masks
-

SUPERCAL LoD Low Vitamin D Content 500g REPASHY
Supplement with low vitamin D content.
66,00 zł -50% 132,00 zł


- Which UVB bulb EXO TERRA choose?
- FAQ
- Terrarium exchanges
- Hodowla żółwi greckich – przewodnik dla pasjonatów
- What is needed for breeding tarantulas?
- How to build a terrarium from furniture board at home?
- Where to buy an animal for a terrarium?
- Aqua Pack Heating Cartridge Test - Heat Pack
- Yemeni chameleon Chamaeleo calyptratus
- How to multiply a tarantula?
- What to do when we have a Brachypelma tarantula without documents?
- What conditions must be met to legally have a Brachypelma tarantula?
- Terrarium for bearded agama Pogona vitticeps
- Hodowla gekona orzęsionego (Correlophus ciliatus)
- How to obtain a certificate of birth in captivity at Brachypelmy in the Veterinary Inspectorate?
How to build a terrarium from furniture board yourself.
We start by planning the dimensions of the terrarium. In our case, it is a terrarium measuring 55cm(l) x 35cm(w) x 40cm(h). When building one terrarium, the easiest way is to go to a castorama or Obi store and specify the dimensions of the plates that we need for construction.
bottom and top - 55cm x 35cm x 2pcs
terra sides - 35cm x 40cm x 2pcs
back - 55cm x 36,4cm x 1pcs
bottom strip - 55cm x 9cm x 1pcs
top strip - 55cm x 5cm x 1pcs
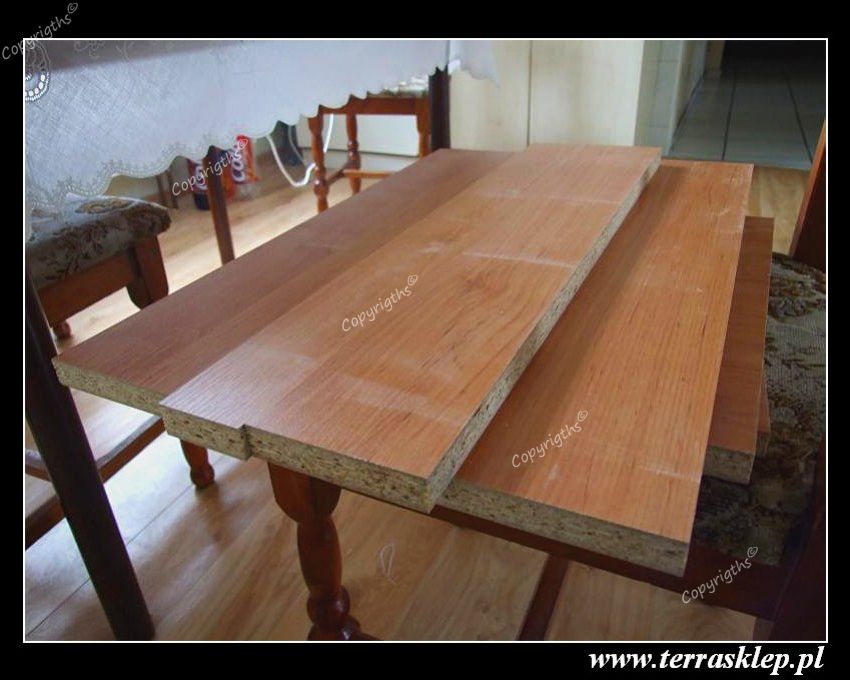
Gentlemen from Castorama cut out ready-made forms ready for assembly. Before paying at the cash register, it is worth measuring whether the pieces are well trimmed and whether the edges are not damaged. We pay for square meters of elements that we ordered, cutting is free. In our case, all the elements in total have almost 1 square meter. The price for 1 square meter for a furniture board in this color is PLN 29.
To make the terra look nice, it is worth covering the edges with a special veneer for furniture boards. We will also buy a edging in Castoram for 5-6 PLN we will probably get from 5m as I remember well.

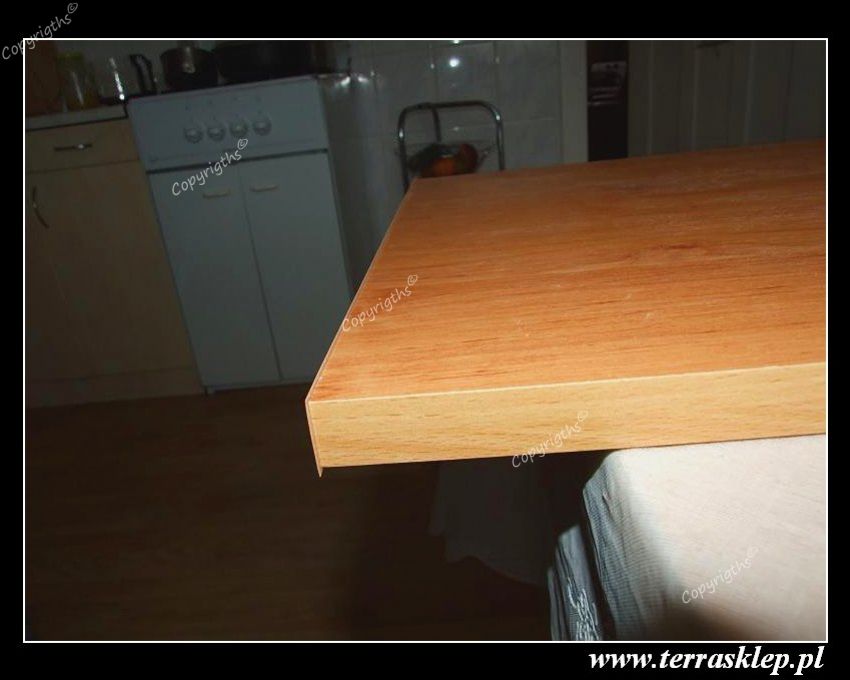
The edging is glued with a heated iron, in the package there is an instruction manual. The edging is 21mm wide, our board is 18mm, so after gluing the edging, it sticks out a little. Excess can be nicely trimmed with a sharp knife, preferably with such a spatula-shaped knife. A set of scissors including this spatula I bought in Castorama for PLN 3 (set in the photo). After cutting off the excess with fine sandpaper, gently grind the edges so that they are smooth and even. Do not overdo it because the edging is quite thin and easily rubs off.

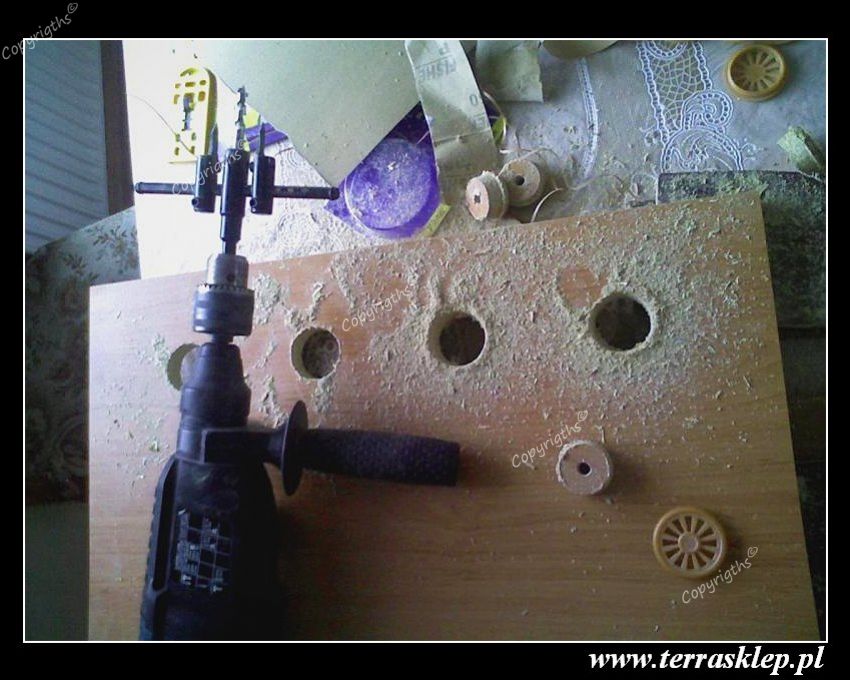
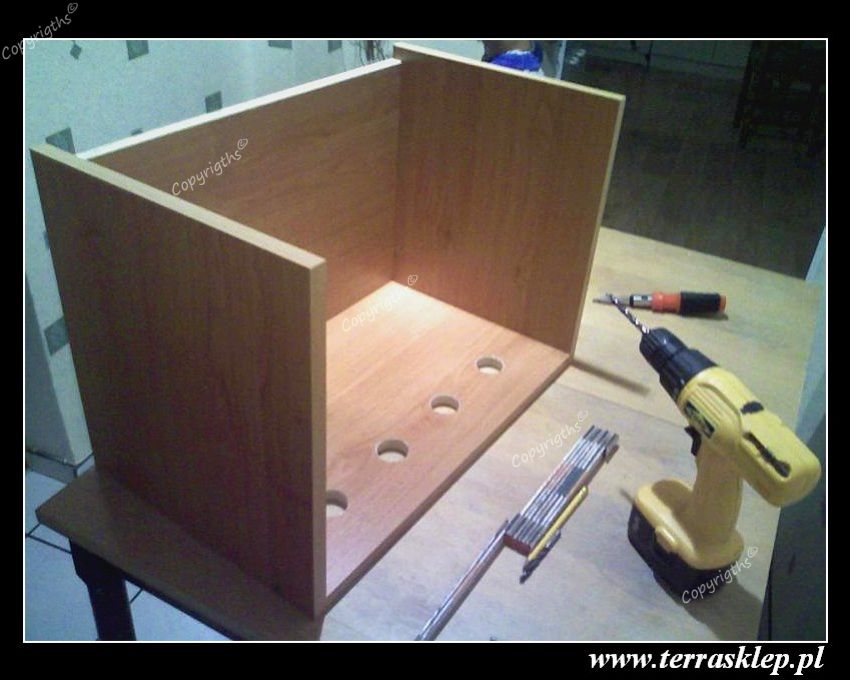
After wrapping all the elements, you can start twisting the elements. In my opinion, twisting is the simplest method of building a terrarium. The boards can also be glued together, but the glue slowly dries and the elements need to be stiffened for this time, which greatly complicates the matter at home. Before starting to twist, I made holes for ventilation wheels with a special hole saw, holes with a diameter of about 4cm are needed. The tools needed to make holes are a drill and a hole saw. I use a hole saw like in the picture. It's an adjustable hole saw on which you set the diameter of the hole you want to get. I have a hole saw in my offer. In Castorama I did not find one and other such without regulation much more expensive in Castorama.

For twisting I use 7/5mm confirmators. Confirmations can be bought in Castoram, but if we need more of them, it is worth going to some other store, preferably furniture, it will save us a few zlotys.
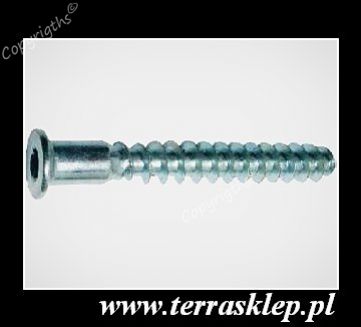
I connect the joined elements in the position to be twisted, drill a hole through both elements with a 5mm drill bit, then correct with a 7mm drill bit but only about 5-8mm deep so that the confirmmat head hides nicely after screwing in. There are special drills for confirmations, the cost of PLN 16 (in Castorama about PLN 30) which make us immediately ready hole for the confirmation. When building such a small terra where we will use a dozen or so confirmmats, we can do without this drill, but with a large terrarium where you will have to drill several dozen holes, it is worth getting such a special drill because changing drills takes a lot of time and the holes are not as accurate as in the case of a special drill for confirmations. After making holes, we proceed to twisting. I twist the elements one by one, i.e. first I drill a hole and immediately twist both elements. I always start by twisting the ceiling with the sides, then the back of the terra and finally the bottom. It allows you to hide some non-fitting elements. And at the end I screw on the two front slats.

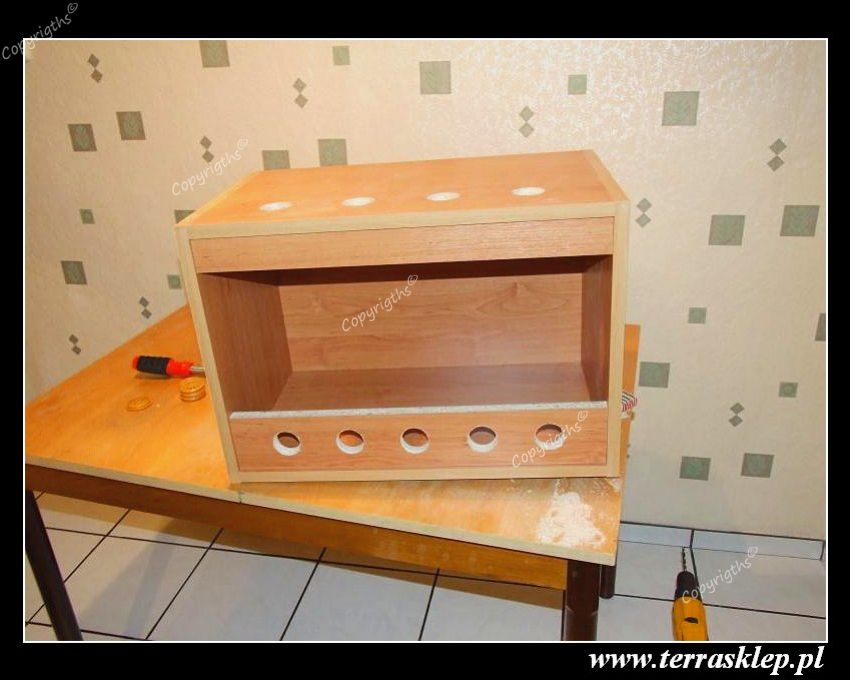
We already have everything twisted. Now I will glue the guides to the windows, the guides cost 14zl per meter. ventilation wheels 40gr per piece. We will get caps for confirmants in Castoram. I glue the wheels and guides with aquarium silicone.

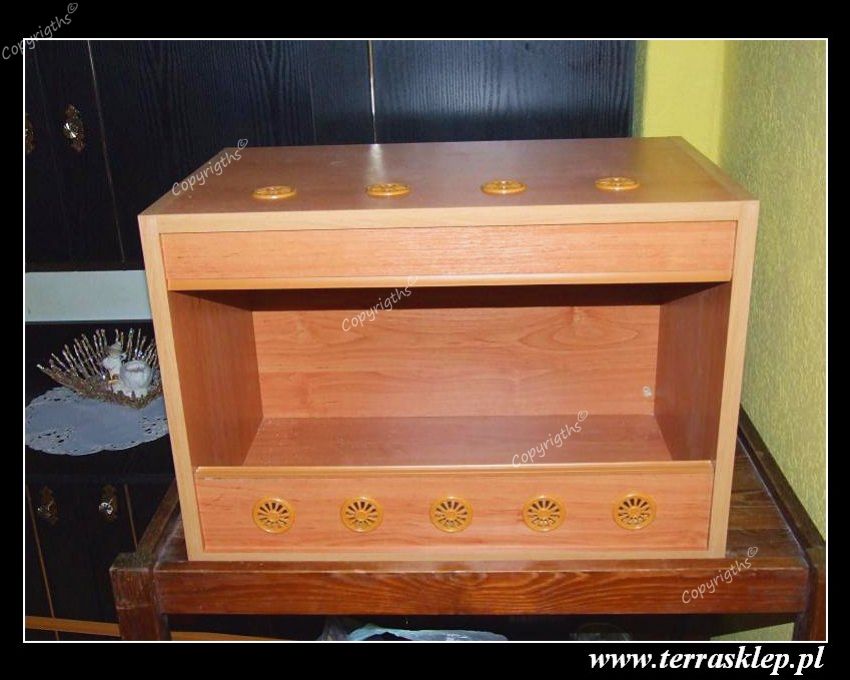
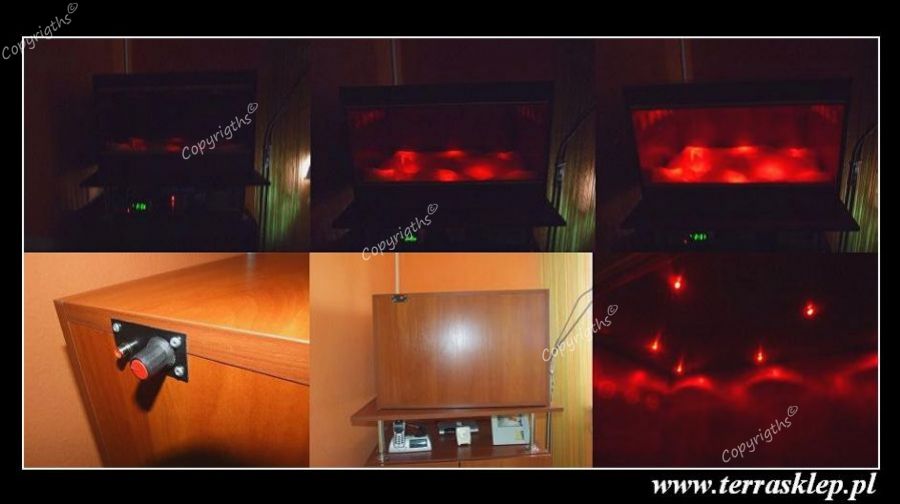
The terrarium is already ready. You can still install some heating in the form of a heating cable or a heating bulb suspended from the ceiling. You can mount some spectacular LED lighting with adjustable intensity of lighting (last photo) in a suspended ceiling the cost of such lighting is about PLN 25.
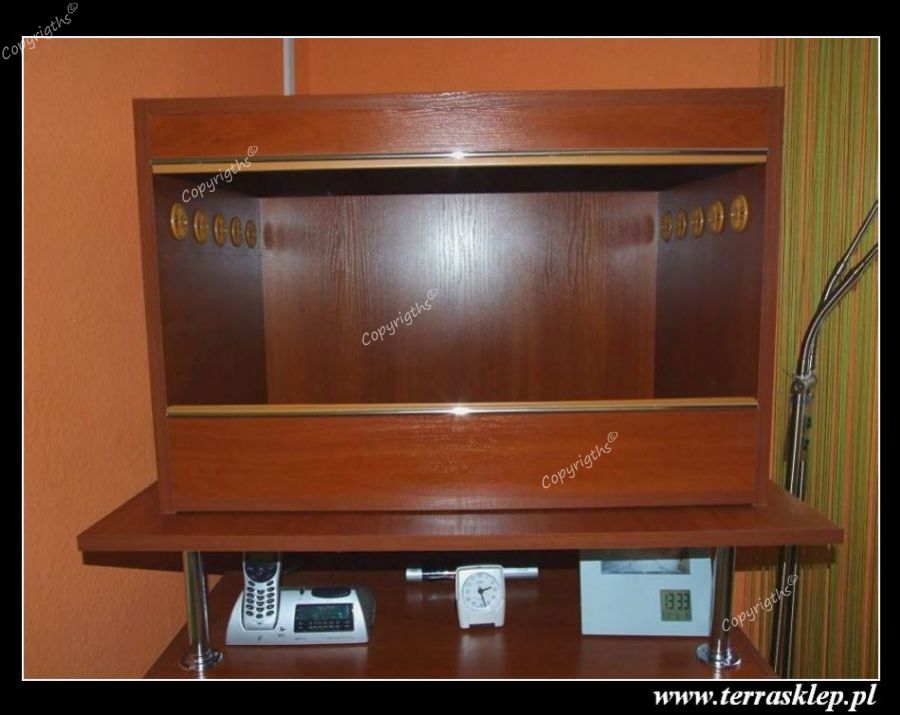
Everything seems quite simple, but in reality you have to work a little hard and spend a lot of time, but the savings will be very large. The cost of building the presented terrarium was less than PLN 100.